Crawl Space Inspection Checklist [Hidden Problems Found in 30 Minutes — Complete Carolina Guide with Pass/Fail Criteria]
A Carolina crawl space inspection covers seven areas: moisture and standing water, structural wood condition, insulation, vapour barrier, pests and wildlife, mechanical systems (HVAC, plumbing, electrical), and ventilation. Most homeowners can complete a basic inspection themselves in 30–45 minutes with the right PPE and a checklist. Schedule annually — ideally in late February or early March before termite swarm season begins, and again in September before rodents start seeking winter shelter.
⭐ Key Takeaways
- ✓Annual inspection is the highest-return maintenance task a Carolina homeowner can perform — early-stage moisture costs $500–$3,000 to fix; the same problem caught at Stage 4 costs $15,000–$50,000+
- ✓Never enter a crawl space without PPE — minimum P100 respirator, Tyvek suit or old clothes, nitrile gloves, knee pads, and a headlamp
- ✓The wood moisture meter is the most important diagnostic tool — a reading above 19% anywhere in the crawl space confirms active conditions for wood rot and mold regardless of visual appearance
- ✓In Carolina, inspect twice per year — late February (before termite swarm season) and September (before rodent invasion season)
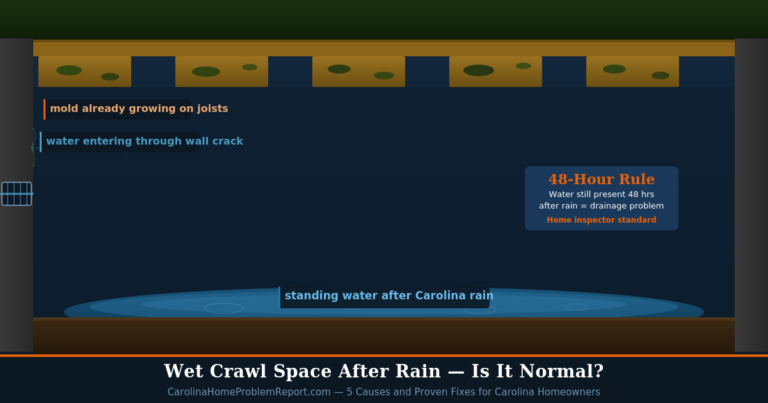
- ✓Five findings that always require same-day professional assessment: standing water, horizontal foundation cracks, sill plate crumbling, active termite mud tubes, and multiple joists failing the screwdriver test
A crawl space inspection checklist is the practical tool that converts the vague awareness that "you should check under your house occasionally" into a systematic 30-minute process that catches problems while they are still cheap to fix. Most Carolina homeowners never enter their crawl space — and every year they do not, the moisture damage, wood rot, and pest activity that begin silently in that space become progressively more expensive to address. The average cost difference between catching a moisture problem early versus late in the Carolinas is not marginal. It is the difference between a $1,500 moisture control upgrade and a $15,000 structural repair project.
According to NC State Extension's house inspection guide, the crawl space is one of the most commonly neglected areas during routine home maintenance — and one of the most consequential. Even a basic visual inspection with a screwdriver, a moisture meter, and a torch covers the critical ground that separates a home that stays structurally sound from one that develops problems silently for years before becoming visible above the floor.
This guide gives Carolina homeowners the complete crawl space inspection checklist — organised by area, with pass/fail criteria for each item, a Carolina-specific seasonal timing guide, the PPE you need before entering, the tools that make the inspection meaningful rather than just visual, and the specific findings that warrant immediate professional attention versus the ones that go on the monitoring list.
In This Article
- When to Inspect — Carolina Seasonal Timing
- PPE and Tools Required Before You Enter
- Step 1 — Above-Floor Pre-Inspection Scan (5 Minutes)
- Step 2 — Moisture and Water Checklist
- Step 3 — Structural Wood Condition Checklist
- Step 4 — Insulation and Vapour Barrier Checklist
- Step 5 — Pest and Wildlife Checklist
- Step 6 — Mechanical Systems Checklist
- Step 7 — Ventilation and Encapsulation Status
- Findings That Require Same-Day Professional Assessment
- Frequently Asked Questions
When to Inspect — Carolina Seasonal Timing
The timing of a crawl space inspection in Carolina is more strategic than most homeowners realise. Two inspections per year — timed to the specific seasonal threats of the region — catches the most issues at their earliest and least expensive stage.
Additional unscheduled inspections — trigger events
Inspect immediately after: any flooding event or standing water discovery, a persistent new musty smell in the living space, a home inspector's report mentioning crawl space concerns, any new floor softness or bounciness, a plumbing leak that may have affected the crawl space, or if you see termite swarmers near the foundation. Do not wait for the scheduled inspection if a trigger event occurs.
PPE and Tools Required Before You Enter
Step 1 — Above-Floor Pre-Inspection Scan (5 Minutes)
Before entering the crawl space, walk the first floor of your home and note any of the following signs. These observations tell you where to focus attention below:
Walk every first-floor room — note any soft, spongy, or bouncy areas underfoot
Open and close all first-floor exterior doors — note any that stick or have changed fit since last inspection
Check for musty or earthy smell — strongest in the morning before the house has aired
Look for diagonal cracks above door frame corners — measure width with a coin if present
Place a marble on the floor in rooms over suspect areas — note if it rolls consistently in one direction
Check tile floors near exterior walls for cracking or lifting — especially in bathrooms and kitchens
Walk the exterior foundation perimeter — look for stair-step brick cracks, horizontal foundation cracks, or gaps at the foundation/sill plate junction
Step 2 — Moisture and Water Checklist
Moisture is the root cause of every major crawl space problem. Check these items first — they determine the urgency of everything else on the checklist:
💧 Moisture and Water — Check Every Item
Standing water — any visible water on the floor or vapour barrier. ⚠ STOP — do not proceed until electricals confirmed safe. Call a professional same day.
RH reading — record hygrometer reading. Pass: below 60% RH. Fail: above 60% RH consistently.
Water staining — high-water marks on foundation walls or piers indicating past flooding level
Condensation — moisture beading on pipes, ducts, or the underside of the subfloor — confirms high humidity even without standing water
Wood moisture content — test at least 6 locations: both sill plates, 2 rim joists, 2 floor joists near the centre. Record all readings. Pass: all below 19%. Fail: any reading above 19%.
Active plumbing leaks — inspect all visible supply lines, drain pipes, and condensate lines. Look for rust streaking, wet soil beneath joints, and water staining on substrate below pipe runs
Dehumidifier operation (if present) — confirm power on, check condensate drain line for blockage, verify unit is not full or showing error codes
Carolina context: In Eastern NC and coastal SC, check the water table depth relative to the crawl space floor. If the soil feels saturated within 6 inches of the surface, a drainage system may be needed regardless of current standing water status. In the NC Piedmont, wet clay soil that has dried and cracked against the foundation indicates the soil has been saturated recently — look for high-water staining above the current soil level.
Step 3 — Structural Wood Condition Checklist
🔨 Structural Wood — Inspect in This Order: Sill Plates → Rim Joists → Girders → Floor Joists
Sill plate screwdriver test — probe the sill plate along the entire perimeter. Pass: firm resistance. Fail: any penetration under moderate pressure. Same-day professional if sill plate fails.
Rim joist condition — tap and probe the full perimeter rim joist. These are the most moisture-exposed structural members — they sit directly above the foundation wall where summer condensation is highest.
Girder/main beam condition — tap the entire length of each girder. Record any soft spots or hollow sounds. Any girder failure = professional assessment before repair.
Floor joist screwdriver test — test at least every 4th joist, plus any with visible discolouration or mold. Record how many fail. Pass: all firm. Monitor: 1–2 soft spots. Call pro: 3+ joists fail.
Visible mold on wood — note location, coverage area estimate, and colour. Surface mold on a structurally sound joist is different from rot. Record both.
Pier post condition — check each post for settling (tilting), and for wood shims at pier tops that are visibly compressed or splitting
Foundation wall condition — look for horizontal cracks (emergency), vertical cracks wider than 1/8 inch, and stair-step cracks in block or brick walls. Photograph all cracks and measure width.
Step 4 — Insulation and Vapour Barrier Checklist
🏙 Insulation and Vapour Barrier
Insulation in place — confirm all floor joist bays have insulation. Count and record the number of bays where insulation has fallen. Pass: all in place. Fail: more than 10% of bays with fallen insulation.
Insulation condition — squeeze-test accessible batts. Pass: firm and dry. Fail: soggy, matted, or visibly stained brown or black. Wet insulation must be removed — it holds moisture against joists.
Vapour barrier coverage — confirm barrier covers all exposed soil. Note any uncovered areas. Pass: full coverage with no bare soil visible.
Vapour barrier integrity — look for tears, punctures, pooling water on top of barrier, and pulled-back sections. Minor tears can be taped with vapour barrier tape. Extensive damage needs full replacement.
Vapour barrier seams — confirm seam overlaps are at least 6–12 inches and taped or still bonded. Gaps at seams allow ground evaporation to bypass the barrier.
Wall liner condition (if encapsulated) — check that wall liner is still secured to foundation walls, that the NC termite inspection gap (3–4 inches) is still visible and unobstructed, and that the liner has not separated from the floor barrier at the wall/floor seam
Step 5 — Pest and Wildlife Checklist
🐛 Pests and Wildlife
Termite mud tubes — scan all foundation walls, piers, and sill plates for pencil-thin soil tubes. Any mud tube = call licensed pest control same day.
Rodent droppings — dark rice-grain droppings on the vapour barrier or substrate. Note location and quantity. Any droppings: seal entry points and set traps. Extensive activity: professional rodent exclusion programme.
Gnaw marks or chewed wiring — rodents chew insulation from pipes and insulation from wires. Any gnawed electrical wiring = fire hazard requiring immediate licensed electrician.
Spider webs — note density and location. Large web populations confirm high insect prey (moisture indicator). Look specifically for black widow low webs in corners. Do not reach into webs.
Snake presence or shed skin — a shed skin confirms a snake has been resident. Most likely a rat snake (non-venomous). Do not handle any live snake. Exit and call wildlife removal if venomous species suspected.
Camel cricket population — large numbers confirm high humidity. This is a moisture diagnosis indicator, not a pest emergency. Reduce humidity and they decline.
Step 6 — Mechanical Systems Checklist
⚙ Plumbing, HVAC, and Electrical
Supply pipe insulation — confirm all supply pipes are insulated against winter freezing and summer condensation. Pay attention to pipes in the outer edges of the crawl space.
Drain pipe condition — look for rust, leaks at joints, and wet soil or staining below any drain connection
HVAC duct condition — inspect all visible ductwork for disconnected sections, torn insulation on ducts, and condensation on duct surfaces. Disconnected ducts deposit conditioned air in the crawl space — this is a major moisture and energy loss problem.
Condensate drain lines — HVAC condensate and water heater overflow lines must terminate to the outside or a proper drain. Any line draining onto the crawl space floor is a direct moisture source.
Electrical wiring — look for wiring lying on the ground or vapour barrier, frayed insulation, and junction boxes without covers. Any wiring concerns: call a licensed electrician — do not touch.
Sump pump operation (if present) — pour a bucket of water into the sump pit to confirm float switch activates and pump runs to completion. Confirm discharge line terminates away from the foundation.
Step 7 — Ventilation and Encapsulation Status
🏭 Vents and Encapsulation
Foundation vent status — for vented spaces: confirm screens intact and no debris blocking vents. For sealed/encapsulated spaces: confirm all vents still sealed with no foam cracking or covers dislodged.
Access door seal — check that the crawl space access door or hatch closes and latches tightly with no significant air gaps at the perimeter
NC termite inspection gap (if encapsulated) — confirm the 3–4 inch gap between wall liner top and sill plate bottom is unobstructed. If debris has accumulated in this zone, clear it.
Pipe and wire penetration seals — all penetrations through the foundation wall should still be foam-sealed with no visible gaps. Gaps are entry points for pests and outdoor air.
Dehumidifier settings — confirm set point is 50–55% RH (not 60% — target well below the mold threshold), auto-restart after power outage is enabled, and the unit has not been unplugged or its circuit tripped
Findings That Require Same-Day Professional Assessment
Most checklist findings go on a monitoring or scheduled-repair list. These five findings require a professional call today — do not wait:
Standing water — call water damage restoration (IICRC-certified) same day. Do not proceed with electrical equipment in the space until water is removed.
Horizontal foundation wall cracks — call a licensed structural contractor or structural engineer. This is the single highest urgency structural sign — lateral soil pressure is actively pushing the wall inward.
Sill plate failure — if the sill plate crumbles, compresses, or separates from the foundation wall when tested with the screwdriver. Do not walk heavily on floors above failed sill plate sections.
Active termite mud tubes — call a licensed pest control company same day. Termite activity continues around the clock once established. Do not disturb the mud tubes before the inspector arrives — they provide evidence of activity level.
Multiple joists failing screwdriver test plus girder involvement — 3 or more joists showing penetration under moderate pressure, combined with any soft spot on a main girder or beam. Do not walk on floors above this area until structurally assessed.

Frequently Asked Questions
How often should I inspect my crawl space in NC or SC?
Twice per year for Carolina homes — late February or early March before termite swarm season, and September before rodent invasion season. Additionally, inspect immediately after any flooding event, a new musty smell, or any home inspector report mentioning crawl space concerns. Advanced Energy's NC crawl space research consistently shows that early detection through regular inspection is the most cost-effective crawl space maintenance strategy available.
What PPE do I need to inspect my own crawl space?
Minimum: P100 respirator (not N95 alone in a space with known moisture history), safety glasses, thick nitrile or leather gloves, old clothes or a Tyvek suit, knee pads, and closed-toe boots. Add a headlamp — hands-free illumination is essential. This PPE protects against mold spores, rodent droppings (hantavirus risk via airborne particles), black widow webs, and insulation fibres. If you have respiratory conditions, asthma, or any immune compromise, have a professional conduct the inspection.
How much does a professional crawl space inspection cost in NC or SC?
A professional crawl space inspection by a licensed contractor or home inspector typically costs $150–$350 in the NC and SC market. Many crawl space encapsulation companies offer free inspections as part of their assessment and quote process — however, understand that a company doing the free inspection is also trying to sell you a solution. For an unbiased professional assessment, a licensed home inspector (not affiliated with a contractor) charging $150–$300 for a standalone crawl space inspection is the more objective choice.
What tools do I need for a crawl space inspection?
The essential tools are a headlamp, a wood moisture meter (most important — confirms moisture damage that is invisible visually), a hygrometer to measure relative humidity, a flathead screwdriver for the wood penetration test, and a phone or camera to photograph findings. Optional but useful: a digital level to check for floor slope, a torch in addition to the headlamp, and this printed checklist. A wood moisture meter costs $20–$50 and is the single best investment a Carolina homeowner can make for crawl space maintenance.
Can I inspect my crawl space myself or do I need a professional?
Most homeowners can conduct a basic visual inspection themselves using this checklist with proper PPE — it is the standard recommendation from Angi, NC State Extension, and most crawl space professionals. DIY inspection is appropriate when the space has adequate clearance (18+ inches), you are physically able to enter, and you do not have health conditions that make crawl space air a risk. Hire a professional if you find any of the five same-day findings on this checklist, if you cannot identify the type or source of damage you find, if the space is too low-clearance for safe entry, or if the space has not been inspected in several years and you want a comprehensive baseline assessment.
A 30-minute crawl space inspection twice per year is the most leveraged maintenance task a Carolina homeowner can perform. The cost of the inspection is a headlamp, a moisture meter, and 30 minutes of your time. The value is early detection of the moisture damage, wood rot, termite activity, and rodent intrusion that — when caught early — cost hundreds to fix and — when caught late — cost tens of thousands. Every major crawl space problem in the Carolina market starts small, progresses silently, and announces itself to the homeowner only after it is expensive.
If your inspection reveals multiple failing items — especially any of the five same-day findings — professional assessment is the next step. A professional can determine repair scope, confirm structural safety, and quote a complete permanent solution that addresses root causes rather than symptoms.
Get a Free Professional Crawl Space Assessment →The Carolina Home Problem Report editorial team researches and writes guides for homeowners across North and South Carolina. Our research draws on NC State Extension Publications, Advanced Energy field studies, Angi crawl space inspection guidance, and insights from licensed Carolina crawl space contractors and home inspectors. We are not contractors or inspectors — we are a research team dedicated to giving Carolina homeowners clear, locally specific, unbiased answers.
Carolina Home Problem Report is an informational resource for homeowners. We are not licensed inspectors or contractors. Always consult a qualified professional for structural, electrical, or plumbing concerns identified during your inspection. See our Disclaimer.